|
This guide and all installation testing was done on a computer running Windows versions 8.1 & 10, and the Hypnos version (1.0.1) of the game. This guide should work just as well with the original Activision version. Users may install either from the game CD if they have one or from an archived copy saved to their hard drive. This copy should include all of the necessary installation files. It is very helpful for users to be familiar with File (Windows) Explorer program. This guide also uses the manual patch by Chad Smith, which is all that is needed to patch the game to version 1.0.2 A. |
|||
|
Step 1a: |
Click on the File Explorer quick launch icon on your taskbar. Users with Windows 8.1 can switch to the more familiar XP style desktop by pressing the Windows key on your keyboard. File Explorer should be pinned to your taskbar. |
||
|
Step 1b: |
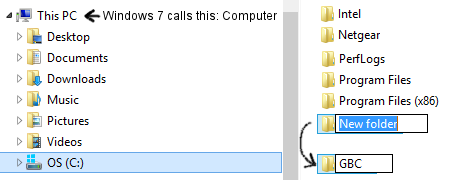
File Explorer is divided into at least two panels. The left panel displays your computers main organization and the right panel will display folders and files. In the left panel, click on the OS (C:) icon. This is the root directory on your computers HD. Right mouse click in the right panel, move your mouse to New and then select Folder. Name the new folder, GBC. This is the folder in which you will install the game. Do not install the game in either of the Program Files folders.
|
||
|
Step 2a: |
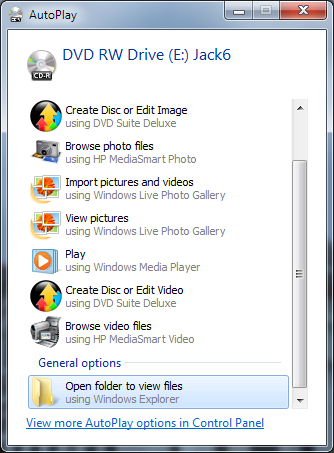
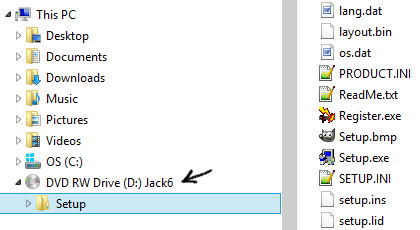
This step is for installing the game from CD. If, instead, you have the installation files from a .zip archive saved onto your HD, go to step 2c below. Insert the game CD in the CD / DVD drive. Shortly, a little window pops up with the title of "Jack6" (image below left). Click on Open folder to view files. It is possible your CD will not AutoPlay, in which case you will need to use File Explorer to browse your computers CD/DVD drive in order to verify the presence of the disk (image below right).
|
||
|
Step 2b: |
Click on the triangle symbol left of the CD title to expand the contents on the disk. This will reveal the Jack6 Setup folder. Click on the Setup folder to display the folders and files in the right panel. Scroll down the right panel until you find the 70 KB file named Setup.exe (or Jack6.exe with some versions). This is the JN6 Installer file. Move on to step 3 below. |
||
|
Step 2c: |
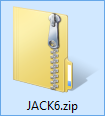
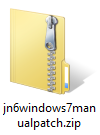
If you received the Activision version of the game in the form of a .zip file, you will need to extract (unzip) the archive. Most likely you downloaded this file from a link sent to you, and it looks like the image below left.
|
||
|
Step 2d: |
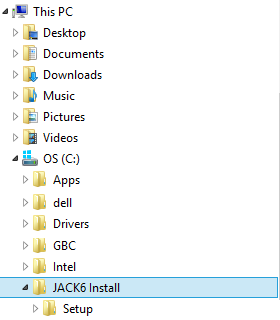
Click on the triangle symbol left of the folder, Jack6 Install, then click on the Setup folder. Scroll the right panel of Windows Explorer until you can see the file called, Setup.exe (see image below). This is the JN6 Installer file.
|
||
|
Step 3: |
Double click on Setup.exe to begin. You may be asked, "Do you want to allow this program to make changes to your computer?" Click Yes to proceed. Setup will then perform several initialization steps and then prompt you to click Next to proceed. |
||
|
Step 4: |
Setup will ask you to read and agree to the Software License Agreement. Click Yes to continue. |
||
|
Step 5: |
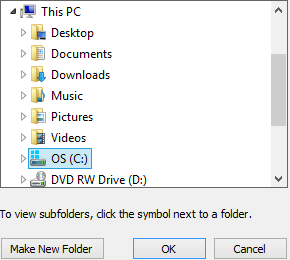
Setup will then prompt you to choose a Destination Folder. WARNING: Do not allow Setup to install to the default folder. Click on the Browse button, click on C: and then the GBC folder which you created in step 1b above. Click OK to confirm your choice. |
||
|
Step 6: |
Setup will then prompt you to choose the type of installation. It is very important you choose Standard Installation, and click Next to confirm. |
||
|
Step 7: |
Setup will now have all the information it needs to continue. Click the Install button to begin. It takes several minutes to complete the installation, during which time you will be shown some in-game screen shots. |
||
|
Step 8: |
Setup will ask if you wish to have a desktop shortcut to the game. Click Yes. It will then ask you to register the game, click No. |
||
|
Step 9: |
When Setup completed, remove the check if you do not want to see the Read Me file, and click Finish to exit Setup. Do not run the game just yet. There are a few more things need doing. |
||
|
Step 10: |
Now it is time to convert your game into a Full Installation. With the game CD still in the drive, open the Setup Folder, and navigate your way to the Data folder on the CD (Setup/JNGBC/Data/). This is the same path if you installed from the archived copy you extracted to your hard drive.
|
||
|
Step 11a: |
Now it is time to patch your game to version 1.0.2 A. Download the Windows 7 Manual Patch from
HERE
|
||
|
Step 11b: |
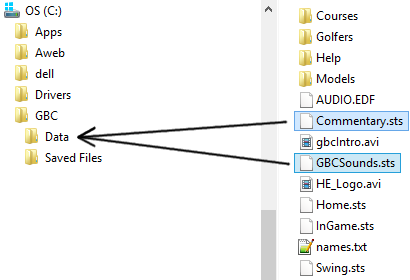
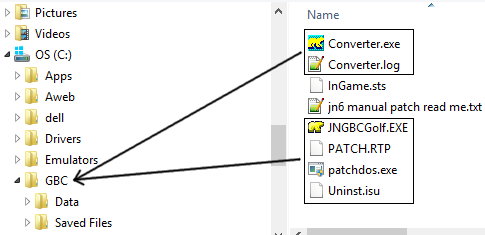
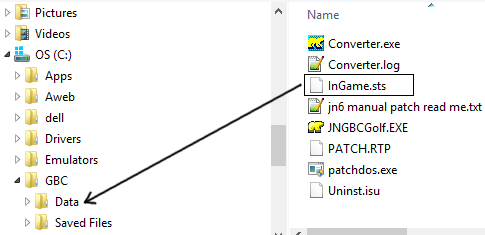
Copy and paste, or drag the following file from the manual patch folder to the Data folder, one level below your GBC folder (image below left). Again, you may be asked to click Move & Replace, to replace the existing file. Very important you do so.
|
||
|
Step 12: |
Remove the game CD from the CD/DVD drive. Launch the game from your desktop shortcut. Windows may pop up a dialogue box reporting something to the effect that, "The publisher of this software could not be verified." Remove the tick from the box to ignore this message in future, and click Run Anyway. |
||

