Tools:
The Designer (JNGBCDesign)
There are many and various techniques for creating bunkers. I am going to detail just two: 1) Flat Ground Bunkers, and 2) Concave Bunkers which are probably more common. The technique for both is quite similar, differing only in the position and size of the terrain shape being employed.
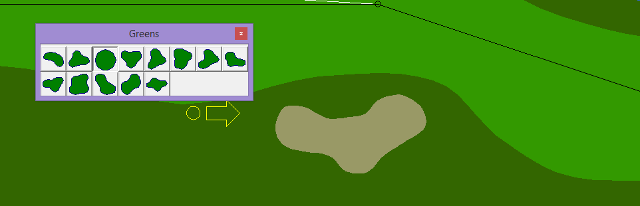
For this first example I will be using the fairway bunker on this hole. I want to begin by raising the terrain in the vicinity of the bunker. I object to bunkers that are over-penal. If the cyber-golfer finds the fairway from the tee they should be rewarded and not have their shot roll off into the hazard. I will make a copy of the round green shape (in the greens palette), change it to terrain, and expand it by 30 feet.
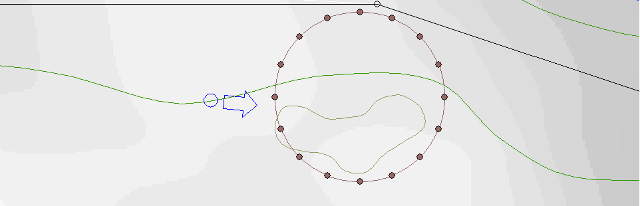
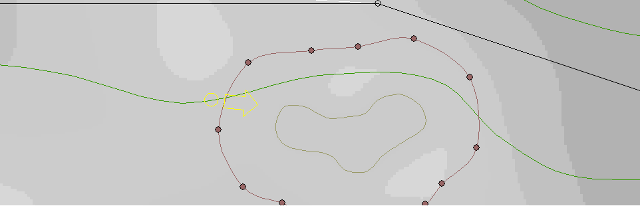
With the terrain shape positioned as illustrated below, I perform a relative Bulge Up by entering a value of 1 foot in the Adjust Height input box. I repeat this procedure after moving the terrain shape a little more to the right, while watching the result in the Rendered View window. Satisfied with the result, I can delete the current shape and move on to the next step.
I now make a copy of the bunker shape, change it to terrain, expand it by 10 feet and position it as illustrated below. Now, moving the cursor over the terrain shape, I check for the lowest elevation present. I am going to flatten the area under the terrain shape to about this value. I will repeat this procedure x number of times after shrinking the terrain shape by some three to five feet each time and decreasing the flatten value anywhere from one half to one foot. This has the effect of creating a flat bottomed bunker with walls of grass or whatever texture shape the designer wishes to use.
Lastly, I expand the terrain shape by about 30 feet to cover the affected region from the previous steps prior to smoothing. You will notice that I have deleted some of the vertices. I find this is necessary sometimes after expanding certain shapes by that much. The animated image below right illustrates the step by step actions taken above.
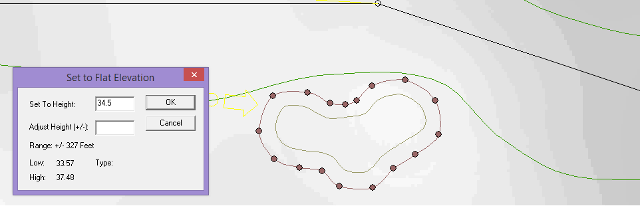
To begin, I make a copy of the bunker shape, change it to terrain, shrink it by one foot, and position it inside the bunker shape as shown in the figure below. As in the previous section, I check for the lowest elevation as displayed in the status bar of the hole design window. I will use this value to flatten the area under the terrain shape by holding the Shift key down while clicking on any of the Flatten tools.
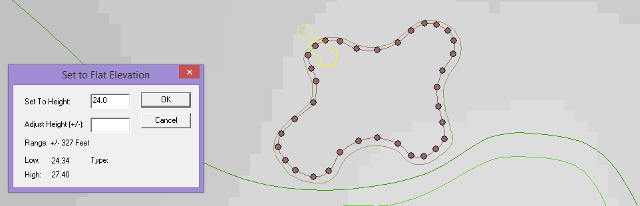
Now I want to repeat this same procedure, but before each additional flattening I shrink the terrain shape by about two feet and lower the value in the Set To Height input box. This results in a more gradual deepening of the bunker.
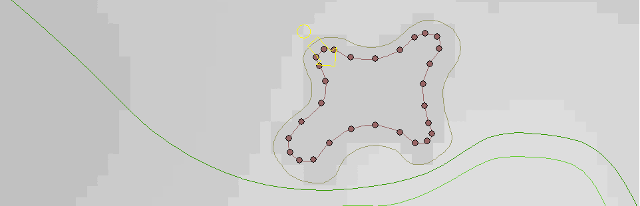
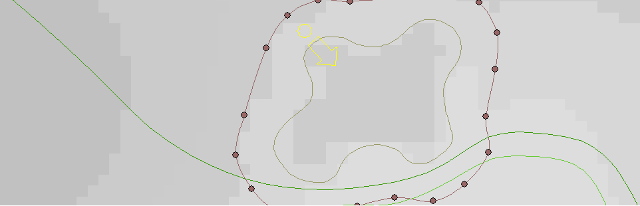
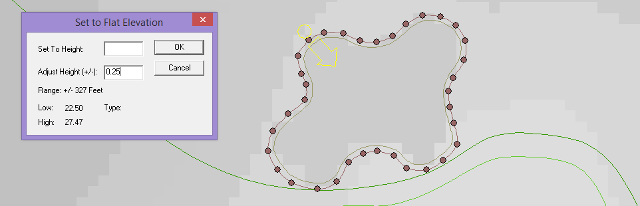
The next step involves raising the area in the vicinity of the bunker by a small relative amount. Why do I do this? Because the last step is a smooth operation which often produces the untoward result of sinking the affected area outside of the bunker. Bumping up this area first will negate this effect. A new copy is made for the terrain shape, expanded by one foot, and positioned as shown in the figure below. With the Shift key + Raise tool combo, I enter a value of 0.25 in the Adjust Height input box.
Before smoothing the bunker I expand the terrain shape from 8 to 10 feet. Depending on the configuration of the shape, I may have to delete some vertices first, as can be seen in the figure below. The animated image below right illustrates the main steps for producing a concave greenside bunker.