Tools:
The Designer (JNGBCDesign)
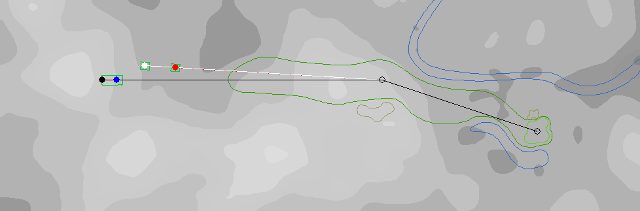
The figure below shows the example hole design I'll be using for all of the terrain building exercises in this section. It has the basic elements: Bunkers, fairway, green, tee's, and two water features.
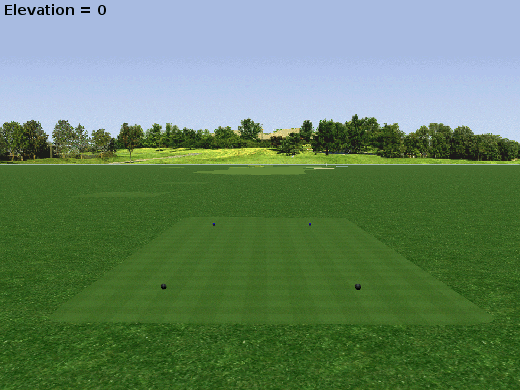
At this point the entire hole is set at an elevation = 0. Flat holes are boring and not very realistic, so some decisions have to be made before we begin actually changing the terrain. I like to give the cyber golfer a good visual of the hole as seen from the tee box, so I want the terrain to slope downward from the left towards the fairway. Then, from about the beginning of the fairway shape lets make the terrain slope uphill to near or a little beyond the dogleg. From that point make the terrain slope downhill again toward the green. To augment this general pattern, let us make the land slope from the bottom of the design window to the top. In other words, from the golfers POV on the tee, the terrain should slope downward from right to left. This sounds like a lot of work. For whatever reason, I find it the most enjoyable aspect of designing.
The Designers Terrain Tools:

Smooth, Bulge Up / Down, Flatten to lowest... highest, Raise / Lower, and four directional sloping. The first four types can also be modified by using the Shift key + Click combo. A dialog box will then present the user an ability to set elevation to absolute or relative values. This is an very useful function which I will detail more fully in later exercises.
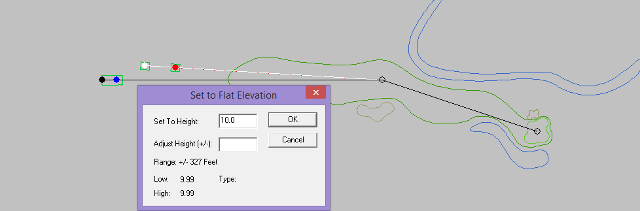
The first step I want to take is change the initial elevation of the hole from zero to ten feet. This will help me better visualize the topography as I work with Terrain enabled under the View menu. To accomplish this I will create a new terrain shape that covers the entire design window. It requires clicking the pencil icon in all four corners of the design window, double clicking the last one to complete the shape. Then Shift key + click any of the flatten tools, enter the value in the dialog box, and click OK to execute. Before proceeding on to the next step, it is expedient to delete the current terrain shape.
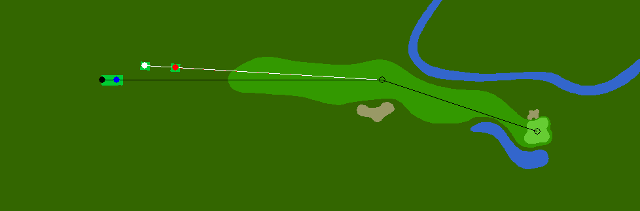
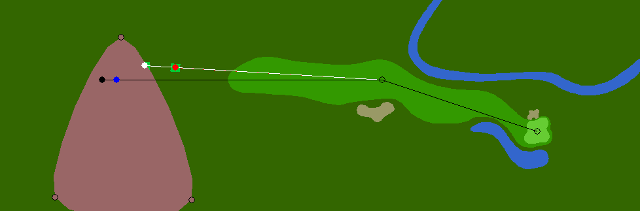
I will now create a new terrain shape as shown in the figure below; a simple three point triangular shape with which I will use the four sloping tools above to achieve the terrain objective for this hole.
As I work, I will move the shape over the entire hole from left to right and bottom to top, rotating it as I see fit. All the while watching the progress with both Outlines and Terrain enabled under the View menu as well as the Rendered View. If I am not happy with the result I can always Undo it. Unfortunately, the Designer only allows one Undo. The figure below is the final rough topographic result of this procedural process.

To smooth the entire hole I created a new terrain shape to cover the entire hole as I did in an earlier step. With it I executed two Power Smooths which is accomplished by holding down the Shift key will clicking on the Smooth icon. I followed this with several normal smooths until I was happy with the result. The two images below show the result before and after smoothing. To better visualize the contours in the hole design window, I decreased the terrain detail.