Using GhostIt and Google Earth to recreate a real golf hole
Lesson 1: Recreating Shapes and Yardages
Tools:
Image Editor.
GhostIt for transparency function.
Google Earth to capture satellite images.
The Designer (JNGBCDesign).
- Create the hole in the Designer and set the tee yardages based on reliable scorecards. A map of the hole can be very helpful as well.
- Delete all the initial shapes the Designer creates.
- Launch GhostIt. The icon will reside in your system tray.
- Launch Google Earth. Use the search function in the sidebar and with any luck Google Earth will take you to the location. You need to become familiar with Google Earths control gadgets. There is no substitute for experience.
- Find the hole you wish to work on.
- Use the rotational control to align the hole approximately as it appears in the Designer.
- The next steps will need to be repeated until you get an image of the hole that has approximately a 1:1 spatial ratio to your hole yardages.
- Zoom in or out using the mouse scroll wheel. Make a note of the Eye Alt data in the status bar.
- Use the view angle control arrow to acquire a straight down view.
- Capture a snapshot of the sat image. I use the PrtScn button on the keyboard.
- Paste the image in your image editor window and crop the image as needed.
- The zoom factor must be set to 100% to match the hole design window.
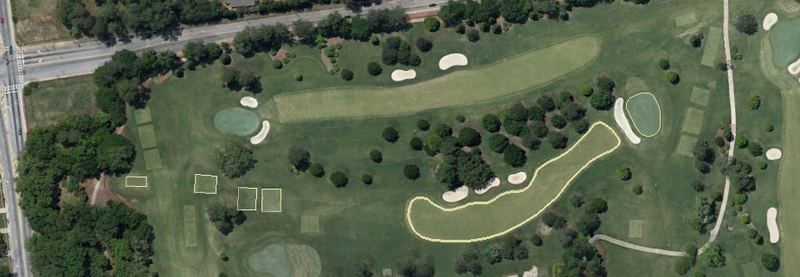
- Sketch in the main shapes: Tees, fairway, and green. (Figure 1)
- Right click on the GhostIt icon in the system tray, select Ghost, move the icon and left click on the hole design window. GhostIt is configured for 50% transparency.
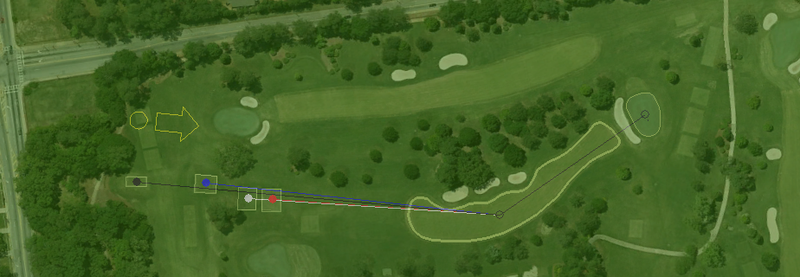
- Move the hole design window to overlay the image window and check for comparable yardage markers (tees & shot points). It helps to put the end shot point centered on the green. (Figure 2)
- If the image is too big or too small, Un-ghost the hole design window, then rinse and repeat.
- Alternative method for steps 7 to 12:
- Rather than acquiring a new image you could use your image editor to scale / resize the image until you're happy with the result at step 14. Too much resizing can degrade the image unless you use the UNDO command.
- I know this sounds tedious but in time you do become quite adept at it.
- With GhostIt still active, move tee markers and shot points as needed. (Figure 2)
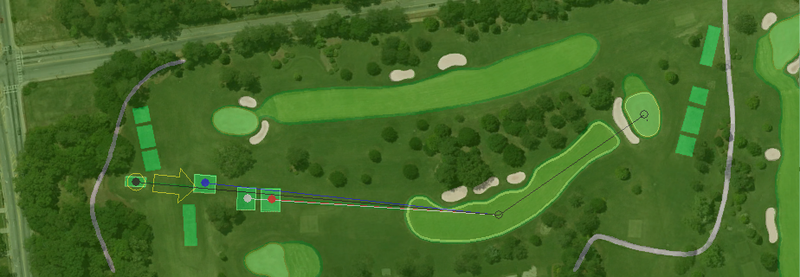
- Now you can begin to add in the main shapes in the hole design window using the transparency as a guide. (Figure 3)
- Later, you can fine tune your work using identical zoom factors for both the hole design window and the image window.
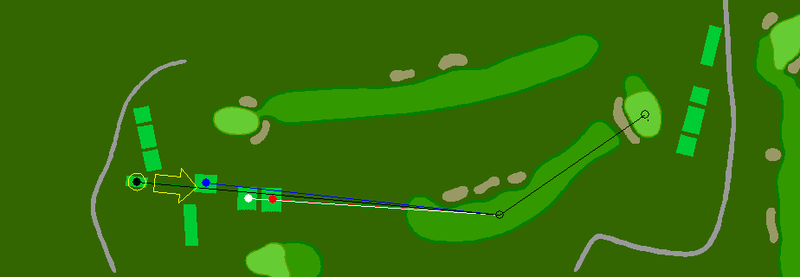
- Figure 4 - Partially completed hole design.
| Figure 1 |
 |
| Figure 2 |
 |
| Figure 3 |
 |
| Figure 4 |
 |
-->Page 2
-->Design Home